|
|
Welcome to Creative Mama, where mamas can have fun connecting creatively with their kids and find meaning in mamahood. |
|
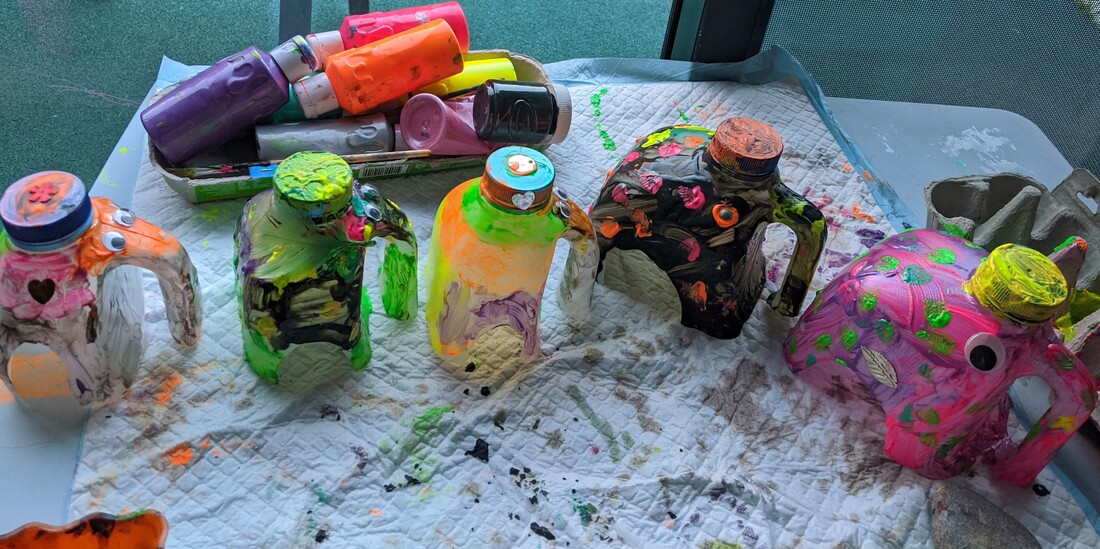
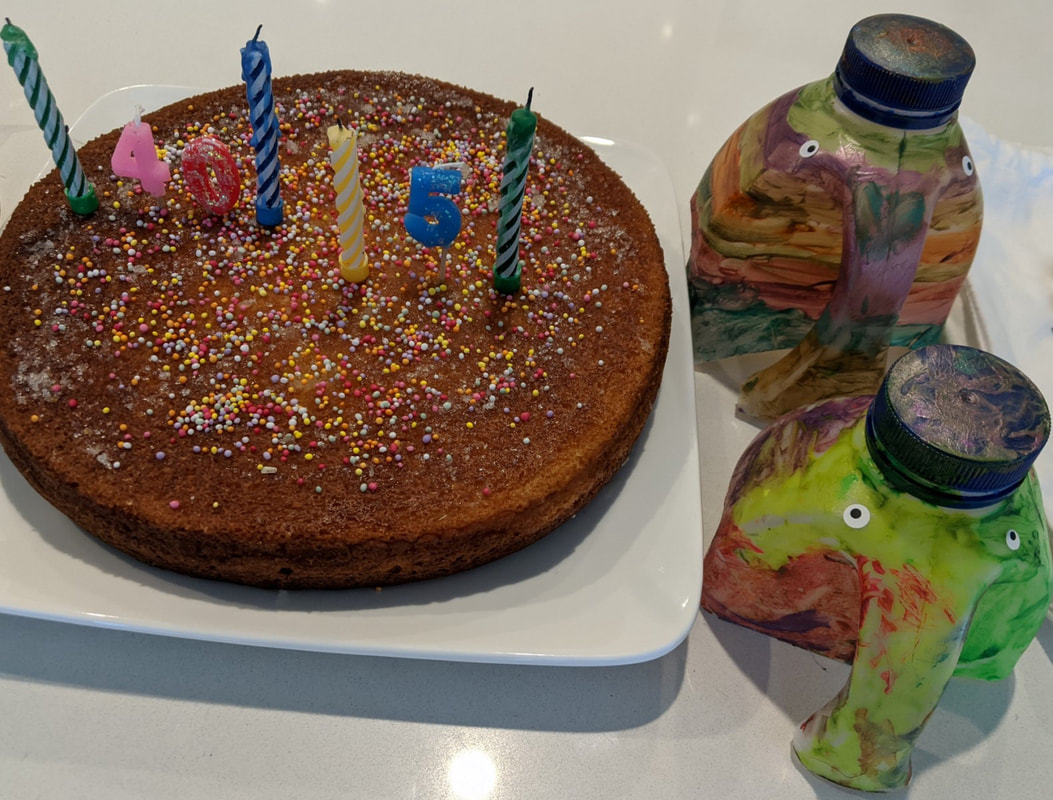
These easy to create colourful elephants (haathees) have been bringing hope to our loved ones, during these times of change. Whilst we continue to put up colourful rainbow artwork around our home to invoke gratitude and show support, we decided to upcycle old milk cartons and deliver funky haathees with positive vibes to family and friends who are recovering from surgery, live alone and celebrate their birthdays in lock down.🌱🙌 What we used:
Let's Create: Lay the milk bottle on it's side and cut the entire bottom half of the bottle off with a serrated (bread) knife, just below the handle, which forms the elephant’s trunk. Cut arches on all four sides to make the legs. Now the fun part! Decorate your haathees with different coloured paint and glue on sequins, stickers, gems with PVA glue. Glue on some (googly) eyes if you have them or paint them on, along with some ears and a tail! Connect and Inspire... Creating these rainbow haathees have helped the kids feel connected and purposeful, knowing they are uplifting their loved ones, during the pandemic. Needles to say, our family and friends have loved receiving their colourful inspirations of hope. These haathees have also been great for imagination play and story-telling. In addition, the kids have practised their fine motor skills and coordination, whilst they designed and experimented with colour. For more rainbow art ideas to bring colour to your kids days, especially during the gloomy grey winter weather, take a look at Painting with Marbles and Creating and Colouring Mandalas. This activity was inspired by The Imagination Tree's Milk Jug Elmer Elephant. The kids enjoy reading this much-loved patchwork haathee's books!
2 Comments
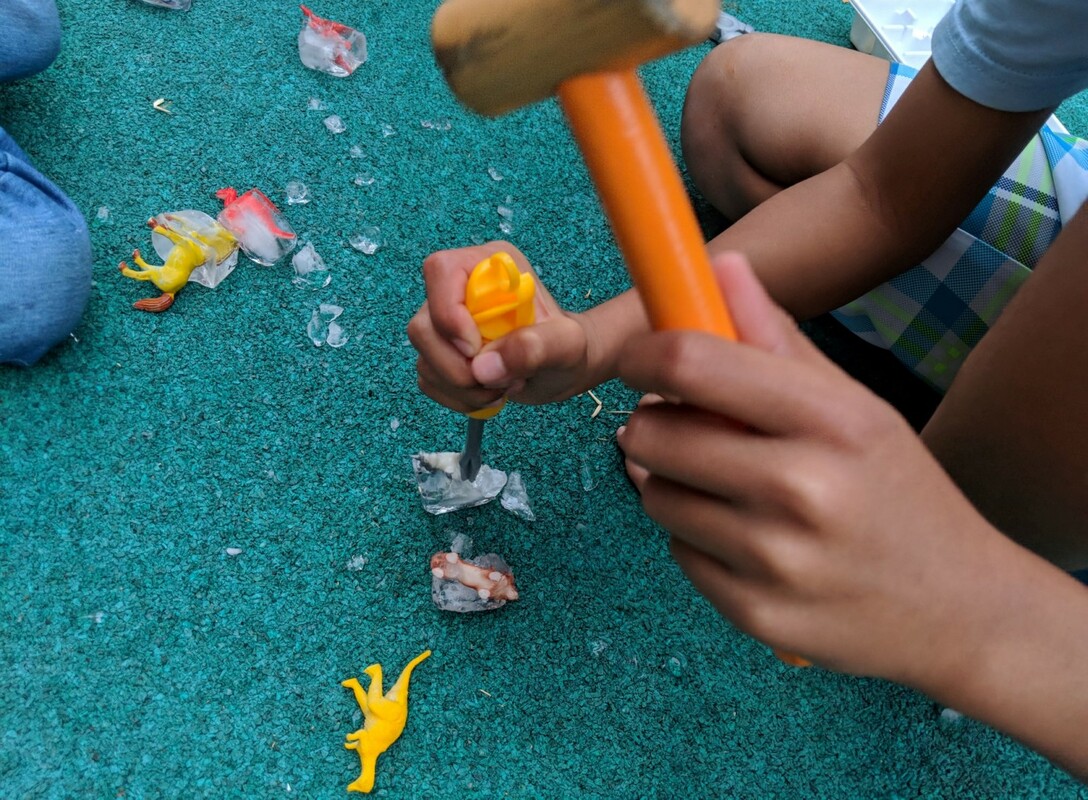
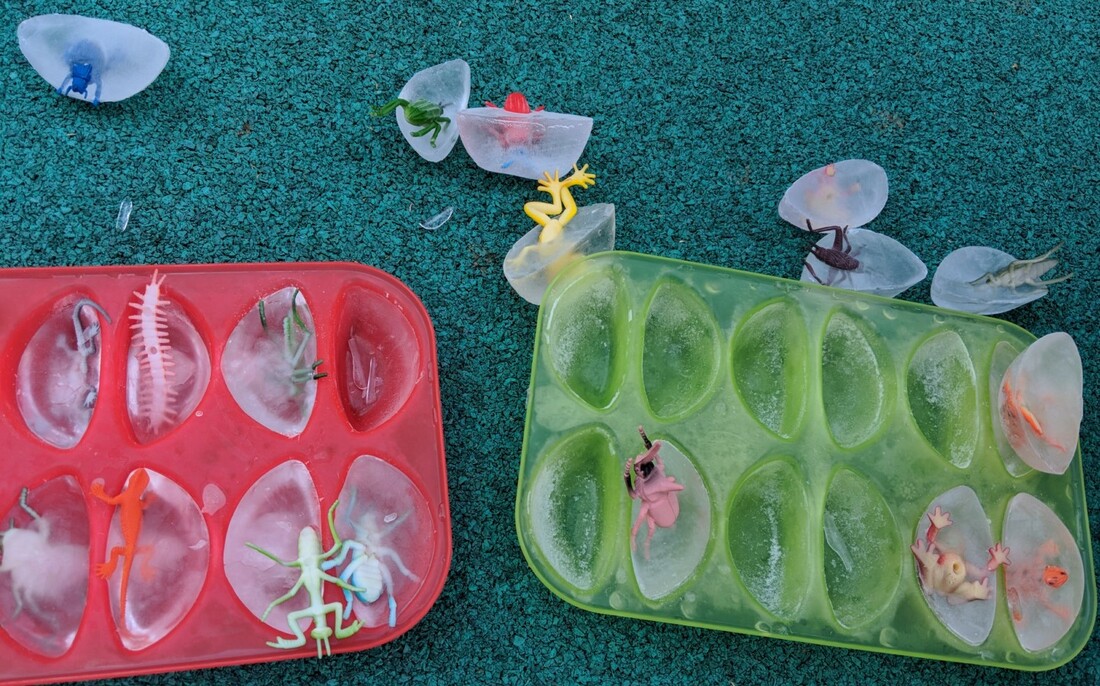
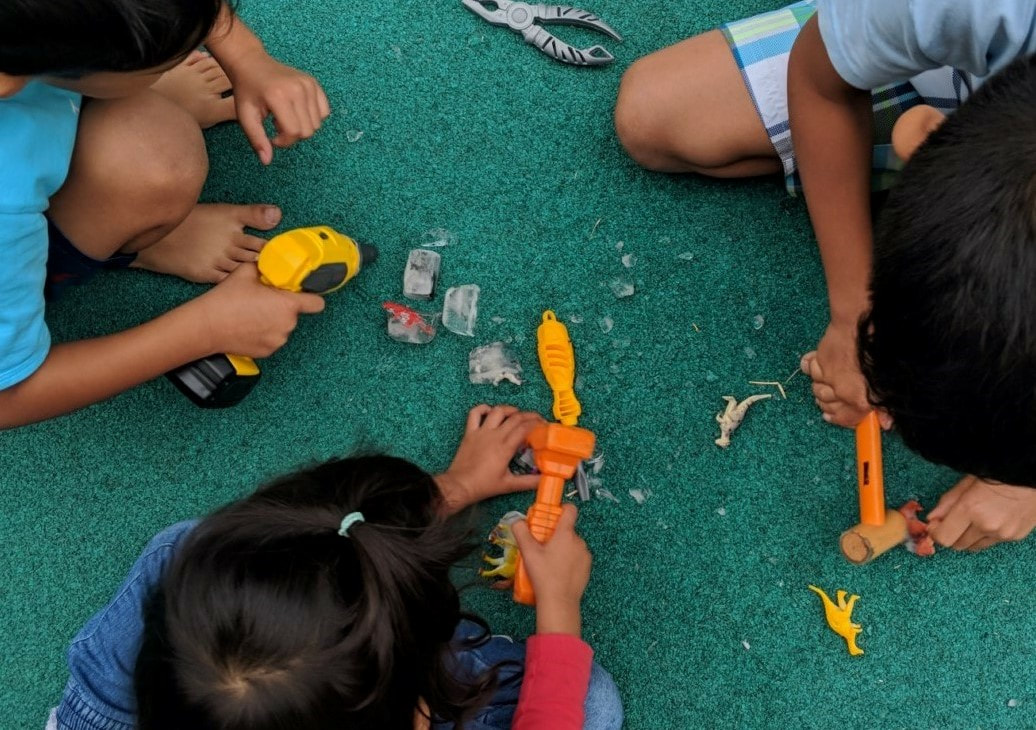
Dinosaurs, digging and tools are a few of my boys' favourite things. So, when they discovered how to create mini ice excavations to free frozen dinosaurs, it was NEXT LEVEL! This STEAM (Science, Technology, Engineering, Art, Math) and sensory play has since become the kids' favourite activity not only because it's fun and easy to do but it also helps them to focus on something engaging, quickly. There is nothing quite like hammering away at blocks of ice to unwind and release energy – for both kids and parents! Now, we always keep an ice tray full of frozen creatures. Preferably, near the ice packs for injuries in our freezer. What is the method behind the madness? When the kids (or I) feel grumpy or get a bump, we quite literally break ice as an ‘ice-breaker’ and a distraction from the stinging pain of cold ice pack on owie! In fact, experts advise the art of distraction is often effective to help calm kids down, especially when they are hurting or need to let go of tension. Now, even the kids' play-dates request this fun, easy and engaging activity when they come over. A win-win for everyone :) Learn how we do it, below. WHAT WE USE:
LET'S CREATE! Invite the kids to place a creature figure in each open space of the ice tray. Then, help them to pour water into each space and put the ice tray in the freezer. When the water has frozen, remove the ice tray from the freezer and extract the ice blocks onto a large surface (preferably on the ground, outside). Then, let the kids excavate away at the ice blocks with their toy tools to free the fossilized bugs or dinosaurs! Another option is to use water sprays to slowly melt the ice blocks. My kids also like to find different things to freeze to keep it interesting, such as tiny trinkets and water beads. CONNECT & INSPIRE... Not only is this activity an effective distraction and releases energy, it also develops skills such as:
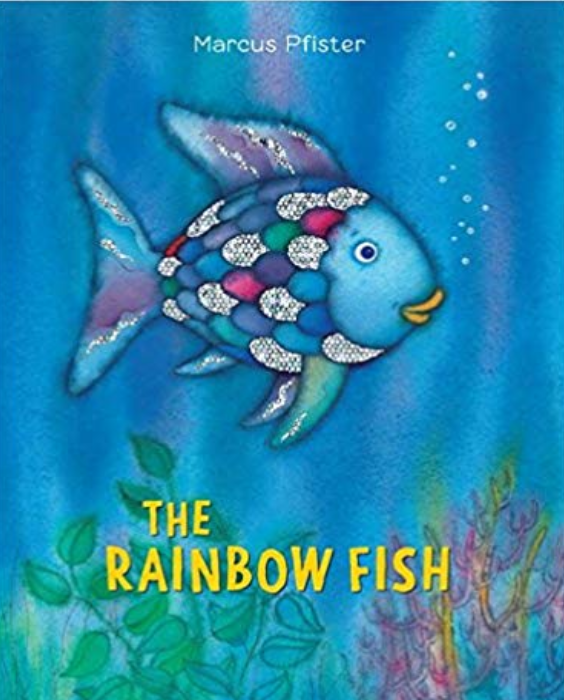
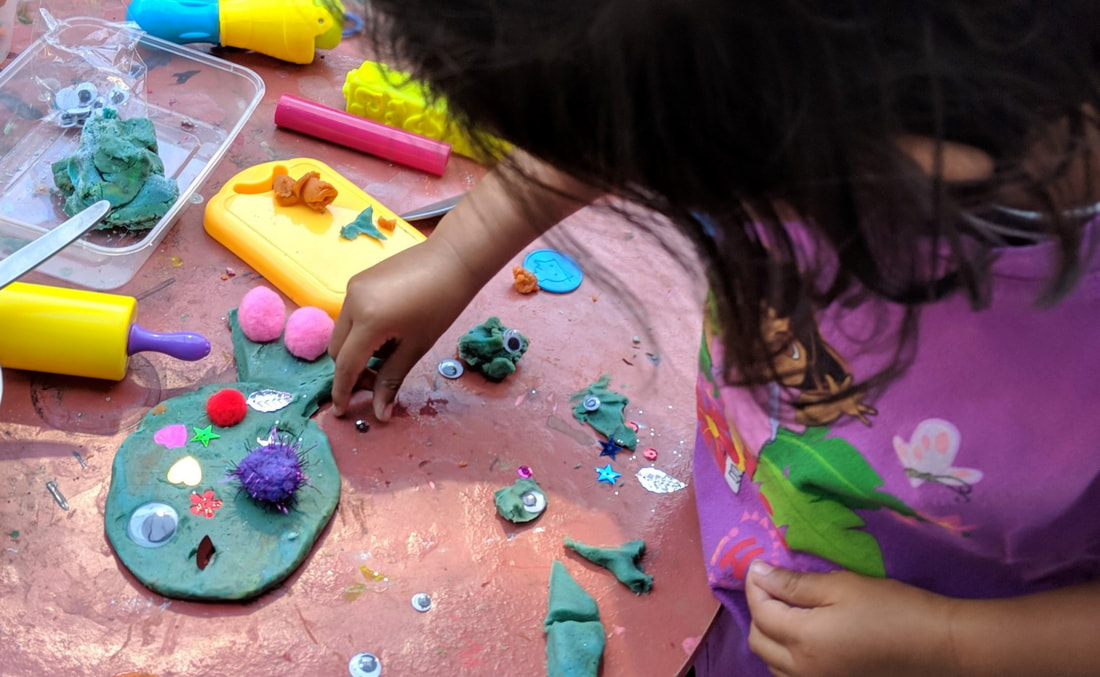
'Scientists have recently determined that it takes approximately 400 repetitions to create a new synapse in the brain - unless it is done with play, in which case, it takes between 10-20 repetitions' - Dr Karyn Purvis So, when this play-based activity to combine a beautiful story with playdough, hands-on learning and real-life experiences came along, we swam towards it! This Playdough Rainbow Fish is fun, easy to create and perfect for extending the kids' understanding of friendship. What we use:
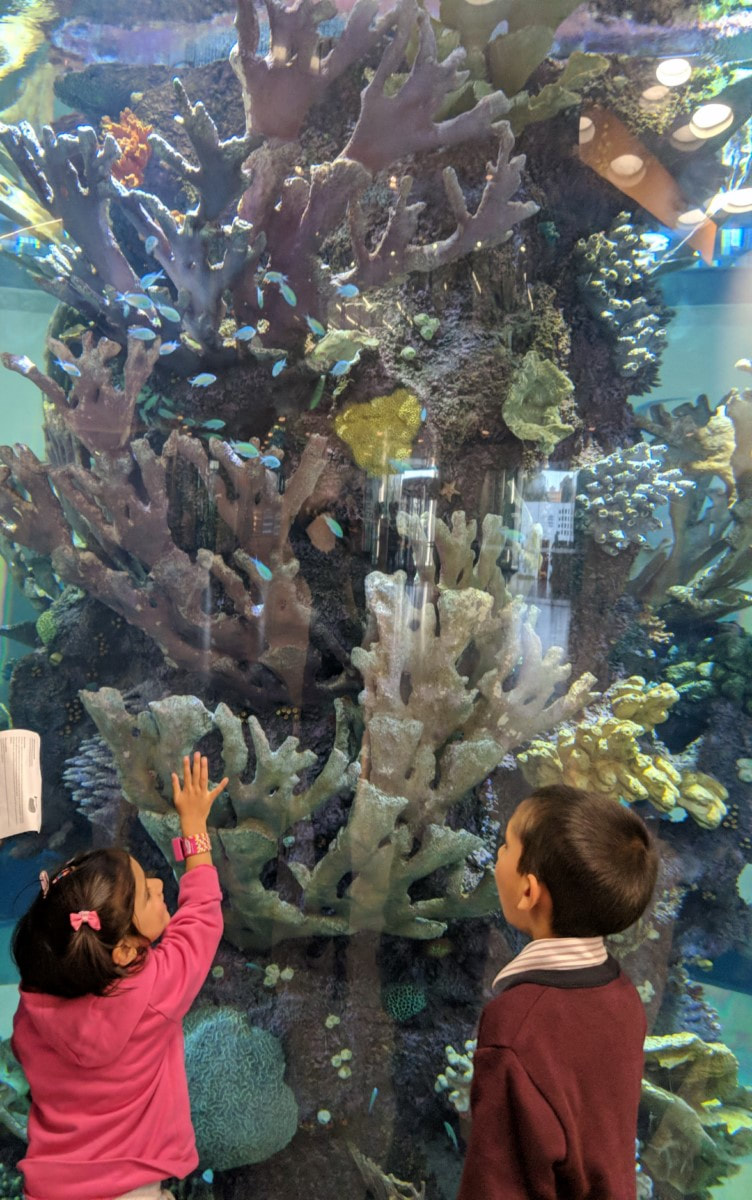
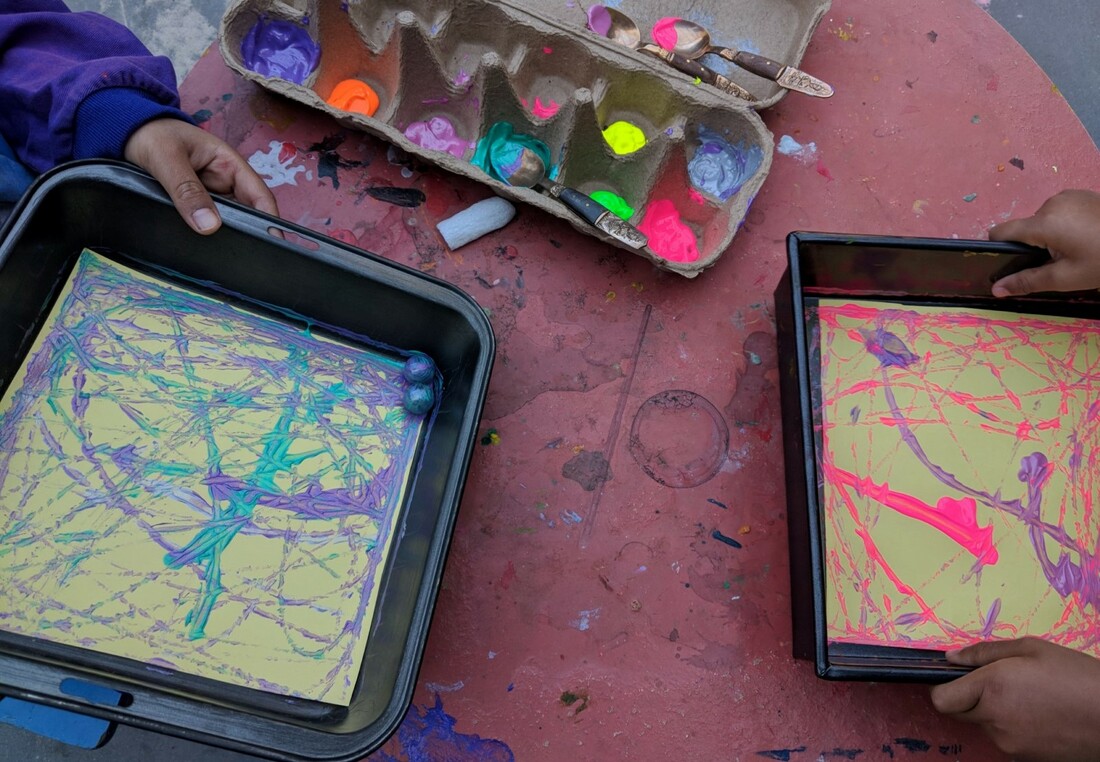
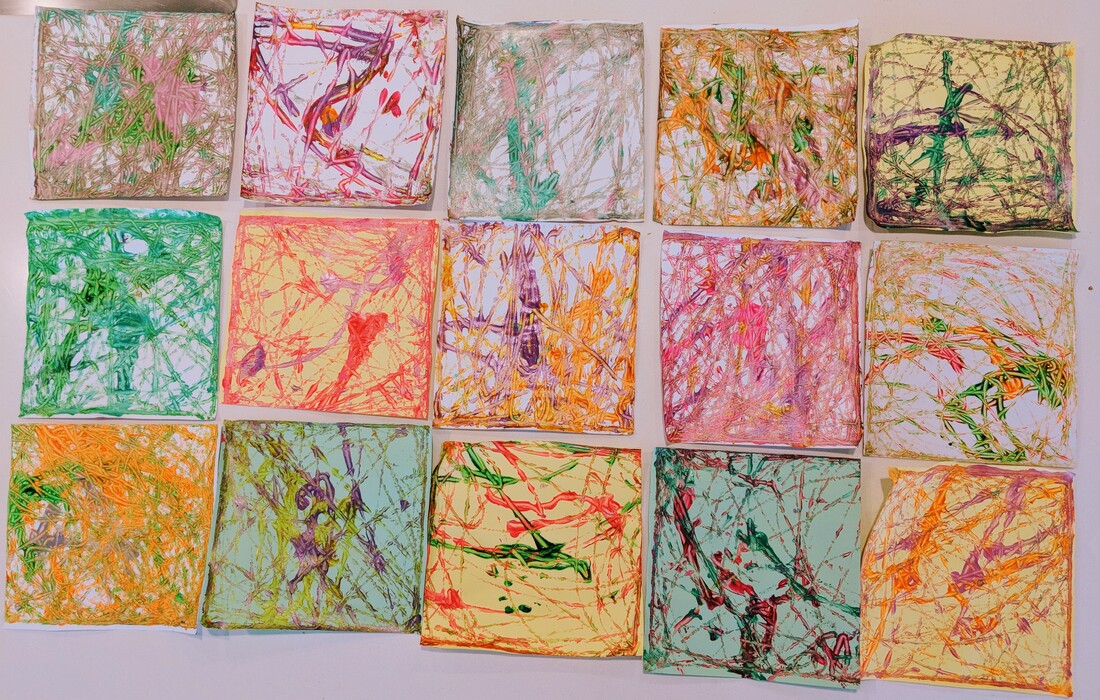
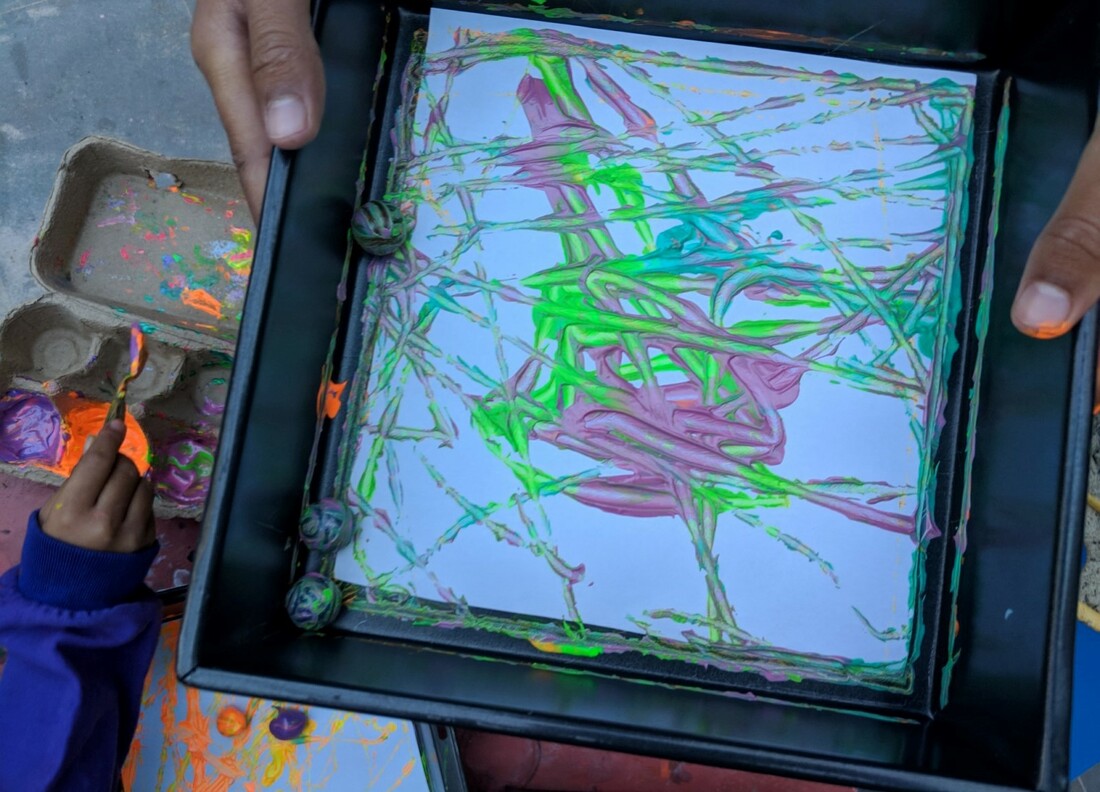
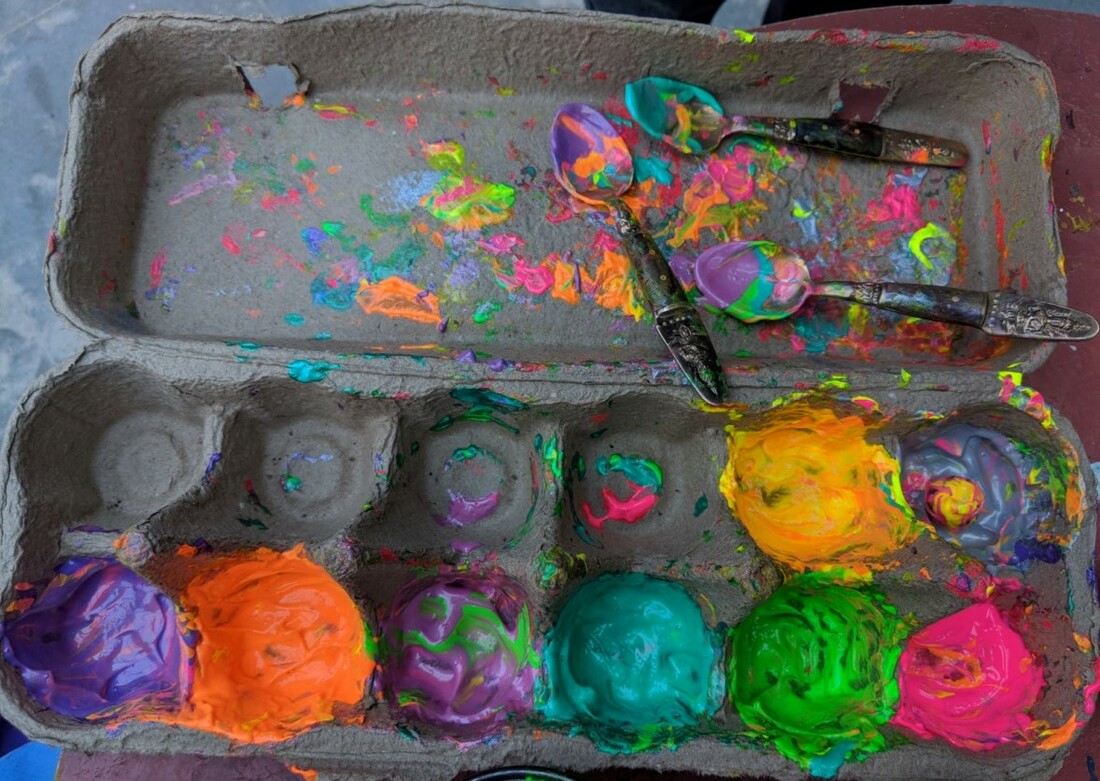
Let's create! After reading and reflecting on The Rainbow Fish story and it's beautiful illustrations, we get creative with the playdough! The kids flatten a ball of playdough using their hands or a rolling pin and cut out a fish shape with a plastic knife or a cookie cutter. All that's left is to place the googly eye on the fish and adorn it with sequins for scales, before it's time for some fun learning! Ideas include counting all the same coloured scales on the fish, standing the scales up on their side and then flat on the fish, creating a pattern of scales such as row of blue scales and then a row of red scales. Connect and inspire... The kids develop language and conversation skills as we discuss the underlying messages of how we can share, learn to give and be friendly in The Rainbow Fish. Taking the kids to experience an aquarium also reinforces their understanding of the many real and beautiful fish in the sea. Apart from using their imagination to create colourful patterns on their rainbow fish, the kids learn fine motor skills, hand-eye coordination and control. In addition, the kids learn math concepts such as counting and experimenting with size and area. Using creative methods to learn math extends problem-solving skills in exciting ways. To learn more about STEAM (Science, Technology, Engineering, Art and Math), please read Fun Marble Runs! What are some other creative ideas in response to The Rainbow Fish story? Creative Mama Joanna recently created a colourfully crafted fish book with her son and we shared it on the Creative Mama Community on Facebook! Painting with Marbles is an art activity for your kids that is super simple to set-up and do - again and again! So it can get a little messy...but the end result - a colourful and abstract piece of art - is totally worth it! It's also a fun indoor play idea that combines art with movement, for kids who like to be active! This activity even encourage kids to apply basic creative skills as part of Science, Technology, Engineering, Arts and Maths (STEAM) concepts into their play - what's not to love about it?! To learn more about STEAM, go to Fun Marble Runs. WHAT WE USE:
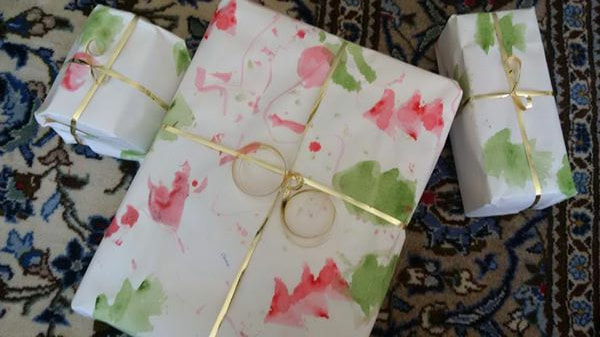
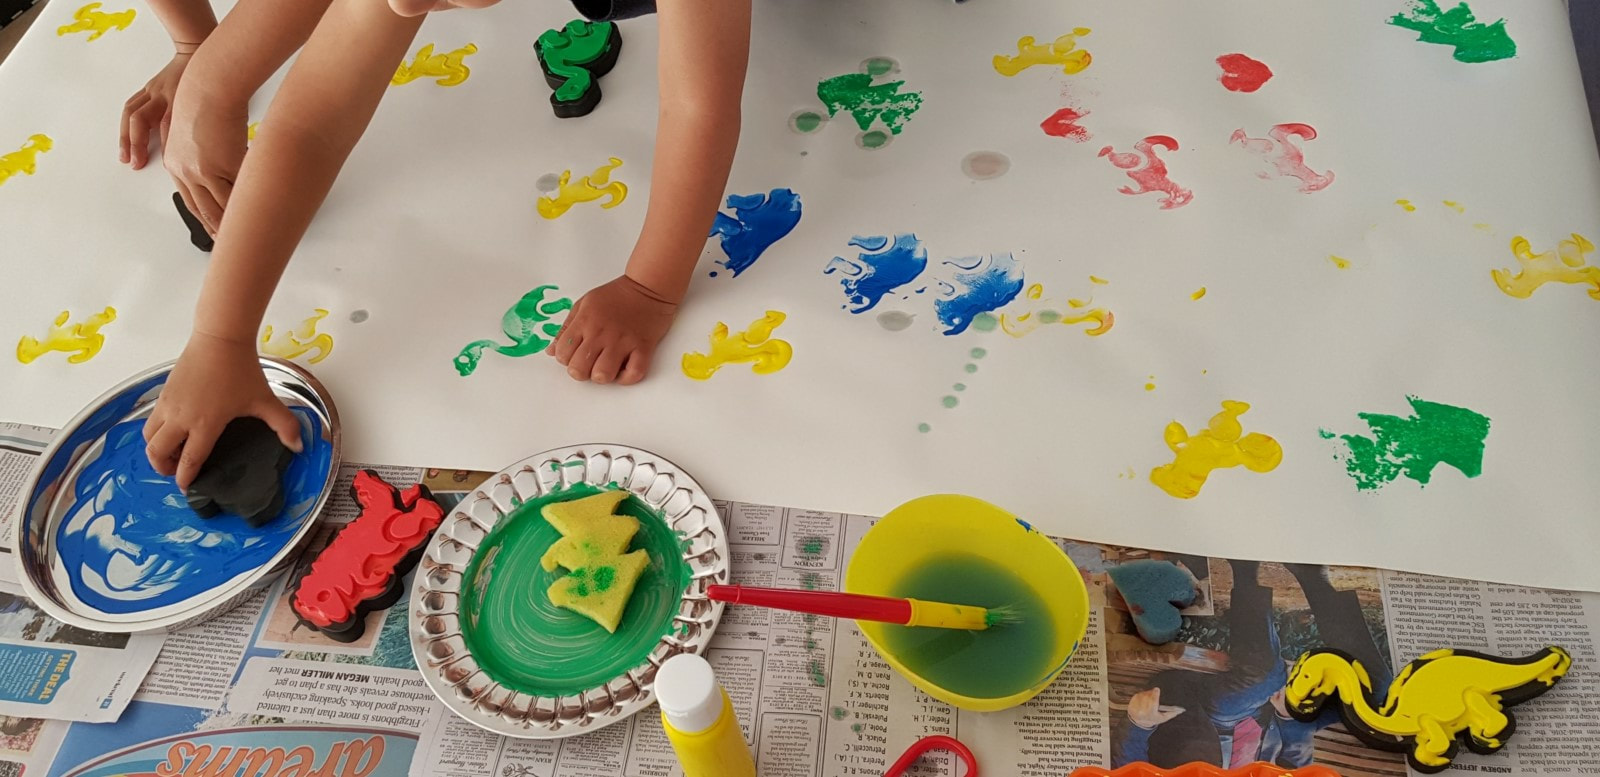
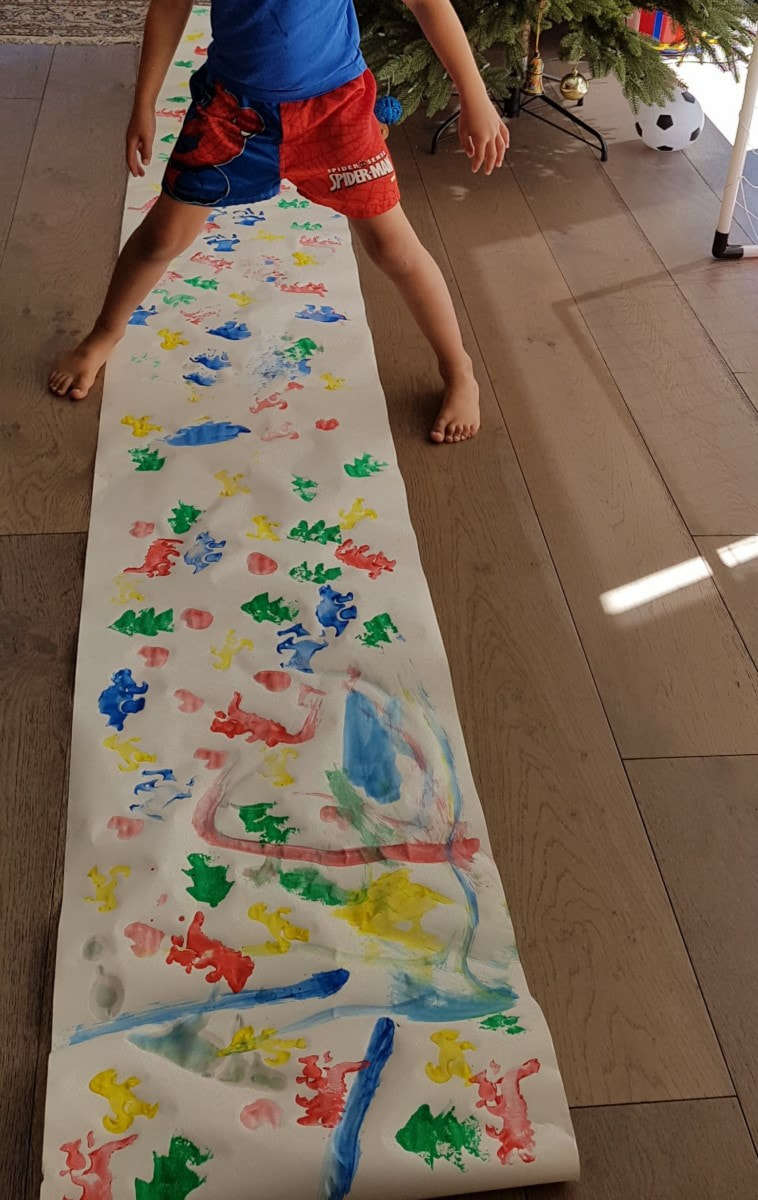
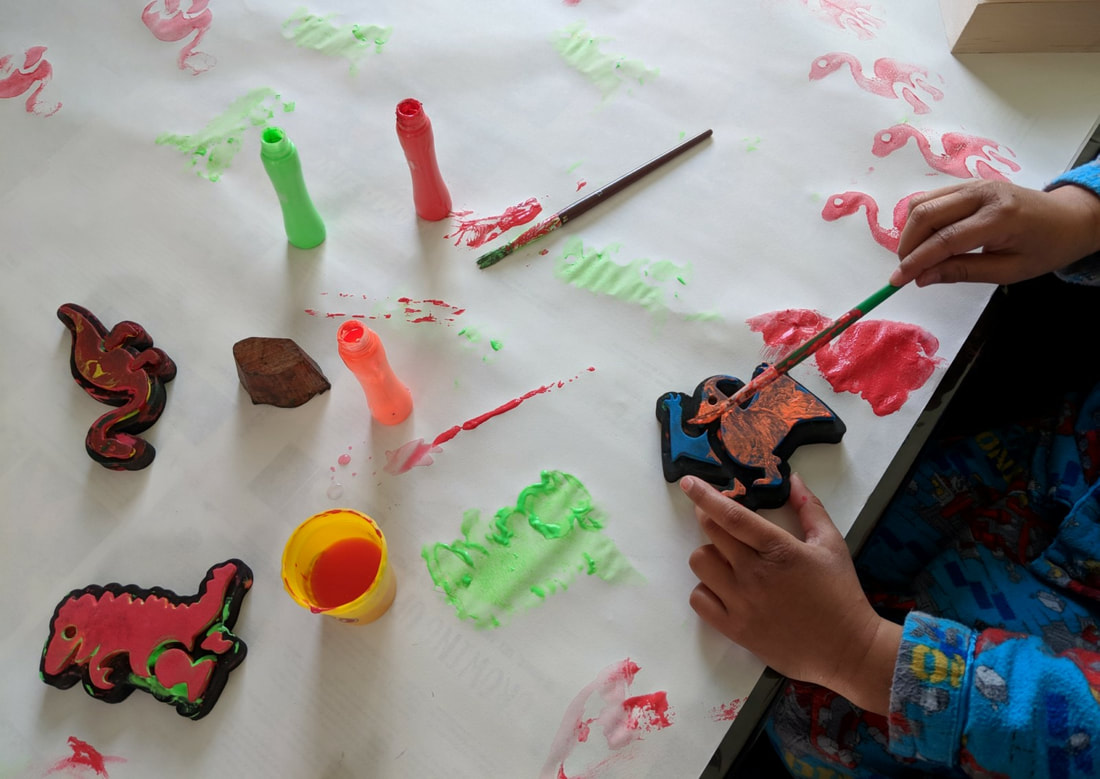
LET'S CREATE! Drop a marble into each section of the muffin tray. Using a spoon, coat the marble with paint and then transfer it to the paper in the shallow dish. Lift the dish and tilt it from side to side so that the paint covered marbles roll around and leave trails of paint, creating interesting and colourful patterns on the paper. CONNECT & INSPIRE... Depending on how much the kids are enjoying the marble painting process, more marbles can be added and can be rolled around the paper to blend colours, creating new colours and designs. Or, you can replace the painted paper with a fresh one and create multiple marble paintings for framing, along side each other. A little messy play is sometimes worth all the effort! I would love for you to share your experiences in the comments section below and any photos you might have taken of your kids cool creations! For some more creative STEAM activities, go to Amazing Mazes and Sensory Play with Light. Giving a gift that is wrapped in paper that the kids made themselves has always made them feel great. There is also an additional sense of pride in creating something that is useful and meaningful. Over the years, it has become a tradition leading up to Christmas to make our own Christmas wrapping paper but this activity is fun to do for Easter and birthday presents as well. WHAT WE USE:
LET'S CREATE! Pour a small amount of different coloured paint onto some trays and place the stamps, sponge shapes or cookie cutters on top of the paint. Stamp these shapes all over the white paper and repeat until the paper is covered with cheerful Christmas colours and shapes. After the paper has dried, it is ready for wrapping Christmas gifts with ribbon. Optional - For some extra bling, squeeze some glitter glue or sprinkle glitter on some clag and onto the wrapping paper. CONNECT & INSPIRE... My kids enjoy getting actively messy with the paints and stamps, whilst creating their personalised pieces of wrapping paper. This is also an opportune time for the kids to learn to share the stamps and paint trays amongst themselves. Mamas can enjoy hanging the kids' home-made wrapping paper up to dry and then help the kids wrap the pressies. |
Categories
All
© 2019 Creative Mama
All photos, images and text are copyright protected. Not to be used without permission. |


 RSS Feed